The Kiosk module in the admin console lets you create and configure kiosk devices. A kiosk is a dedicated single-purpose or multi-purpose device that runs apps in a restricted environment. You can create kiosks, configure their settings, assign them to groups, and manage devices in kiosk mode.
Viewing available kiosks
In the admin console, click the Kiosk icon from the left navigation menu.
A list of available kiosks is displayed in table format with columns showing kiosk name, launcher, mode (single app or multi-app), device type, app count, creation date, and last updated date.
The Kiosk list includes the following features:
Create kiosk – Add a new kiosk configuration
Download – Export kiosk details to an Excel file
Context Menu – Right-click options to view, edit, assign to groups, enroll devices, or delete kiosks
Column Chooser – Show or hide table columns
Pagination – Navigate through kiosk lists when there are many kiosks
Items Per Page – Set the number of kiosks displayed per page (default is 10)

Creating a new kiosk
Click the Create kiosk button at the top of the Kiosk list.
The Create kiosk screen opens with the following fields:
Kiosk name (required) – Name of the new kiosk
Platform (required) – Select Android (mandatory)
Description (optional) – Brief description of the kiosk's purpose
Select the Device mode:
Single app – Restricts the device to run one app only
Multi app – Allows the device to run multiple apps
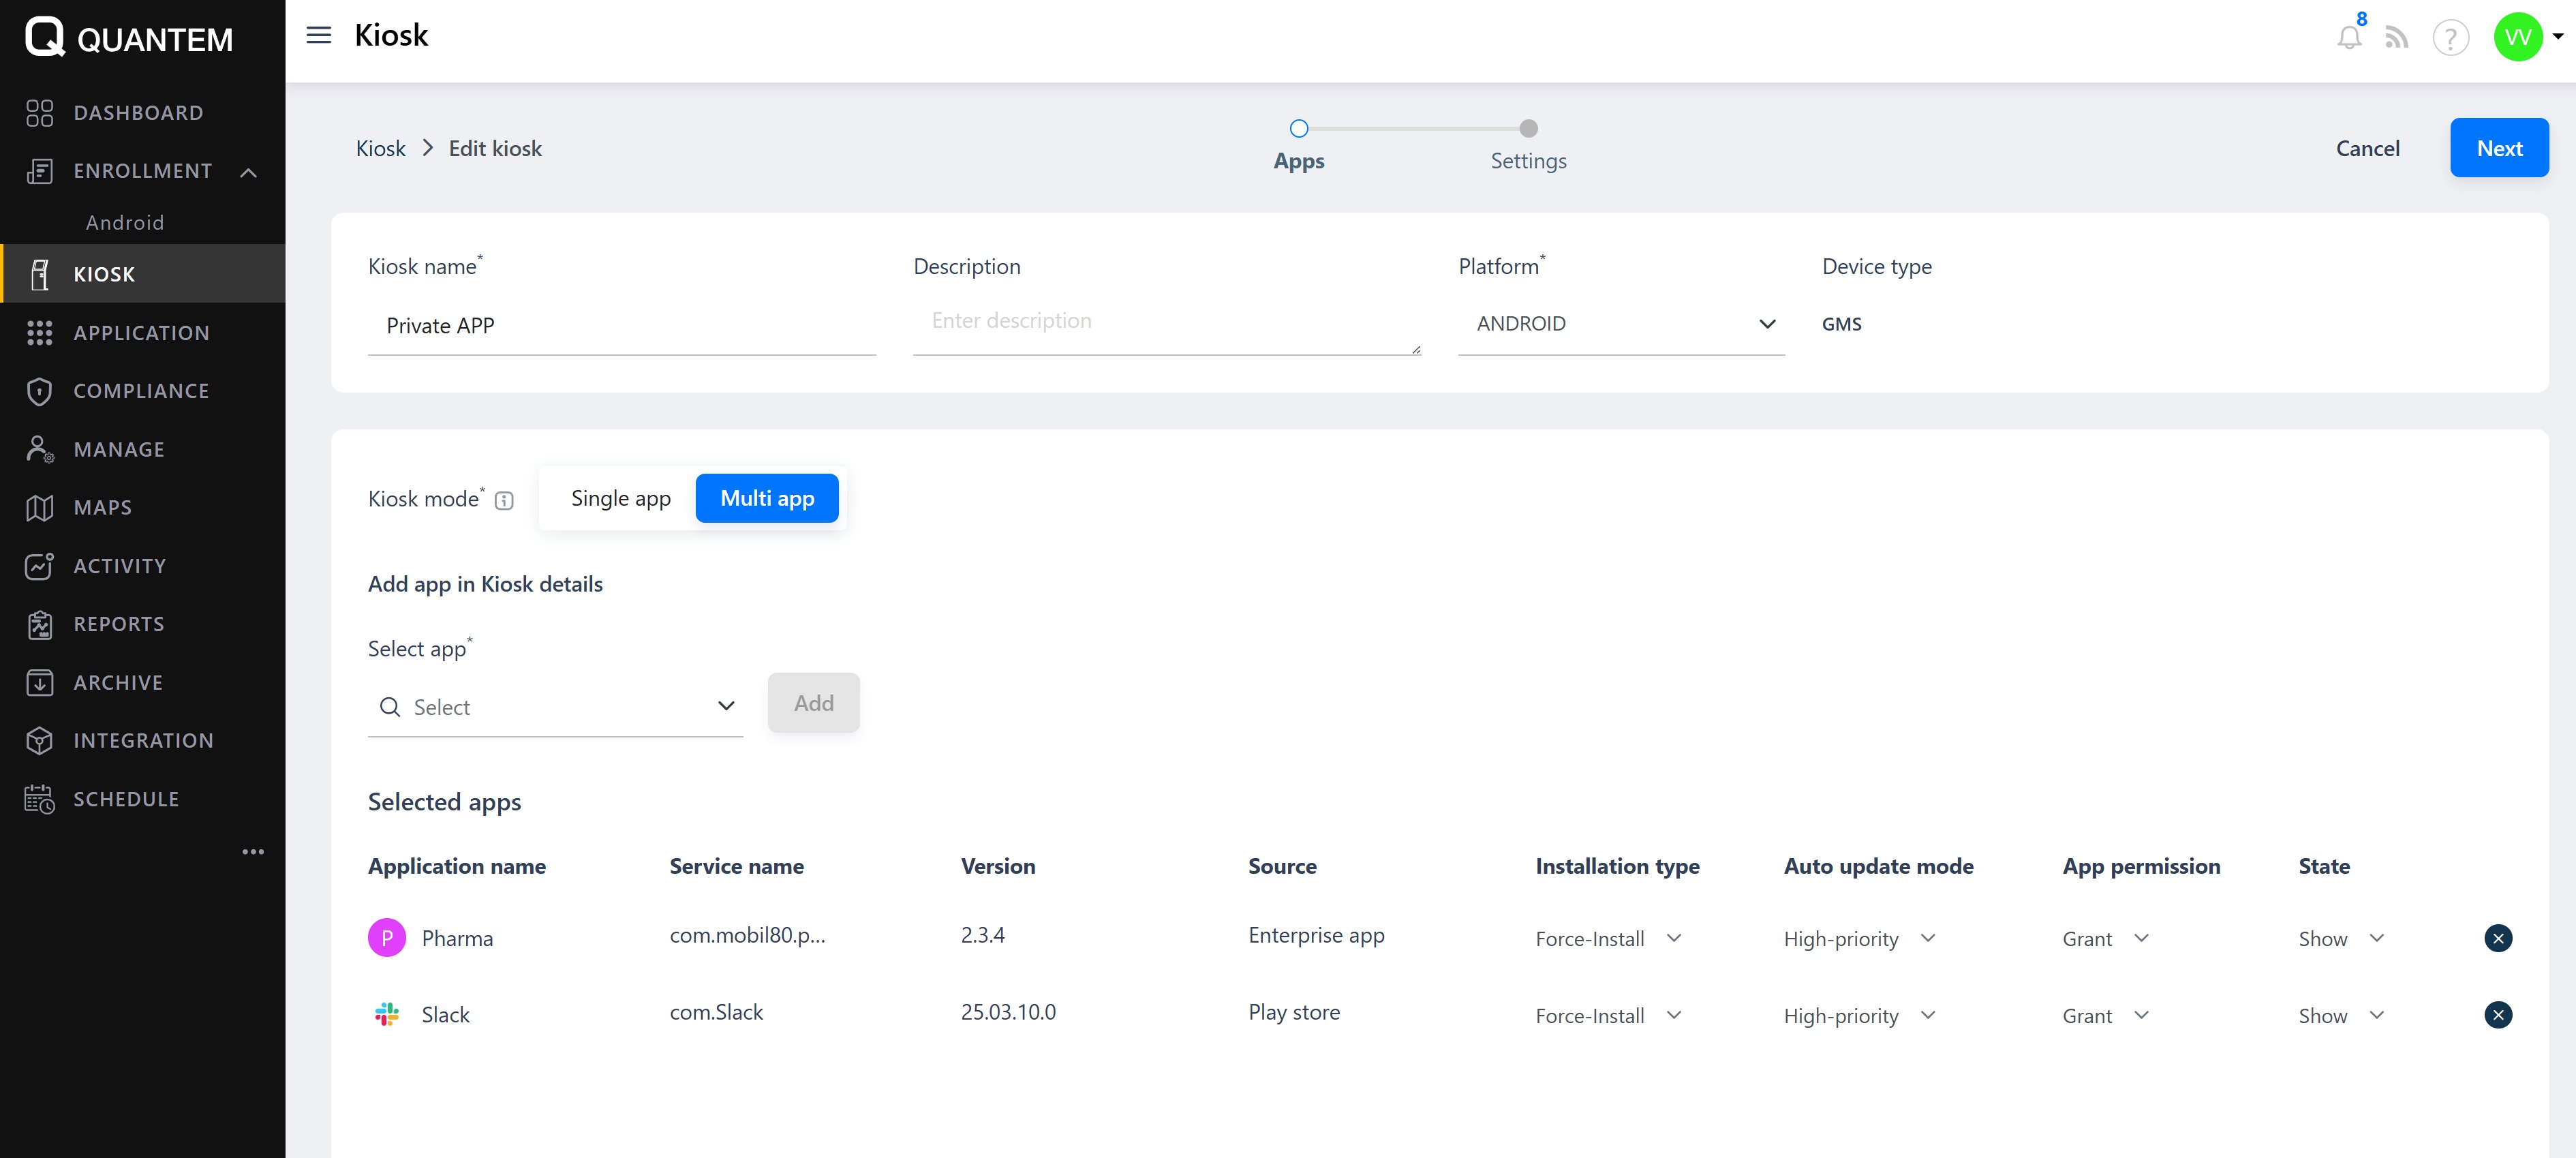
Click Select app to choose an app and click Add to include it in the kiosk. The selected apps appear in the Selected apps section.
Repeat step 4 to add additional apps.
If Single app mode is selected, choose which app will appear as the kiosk system launcher.
Click Next to proceed to the settings screen.
On the settings screen, configure options in the following categories:
Kiosk settings – Power button behavior, system navigation, error warnings, status bar, app settings, OS updates
Security settings – Encryption policy, password quality, device radio state, connectivity management
Policy settings – Camera access, microphone access, factory reset, screen capture, keyguard features
Display settings – Stay on plugged modes, auto date and time zone
Browser home screen – URL filtering
Sound settings – Camera and notification sounds
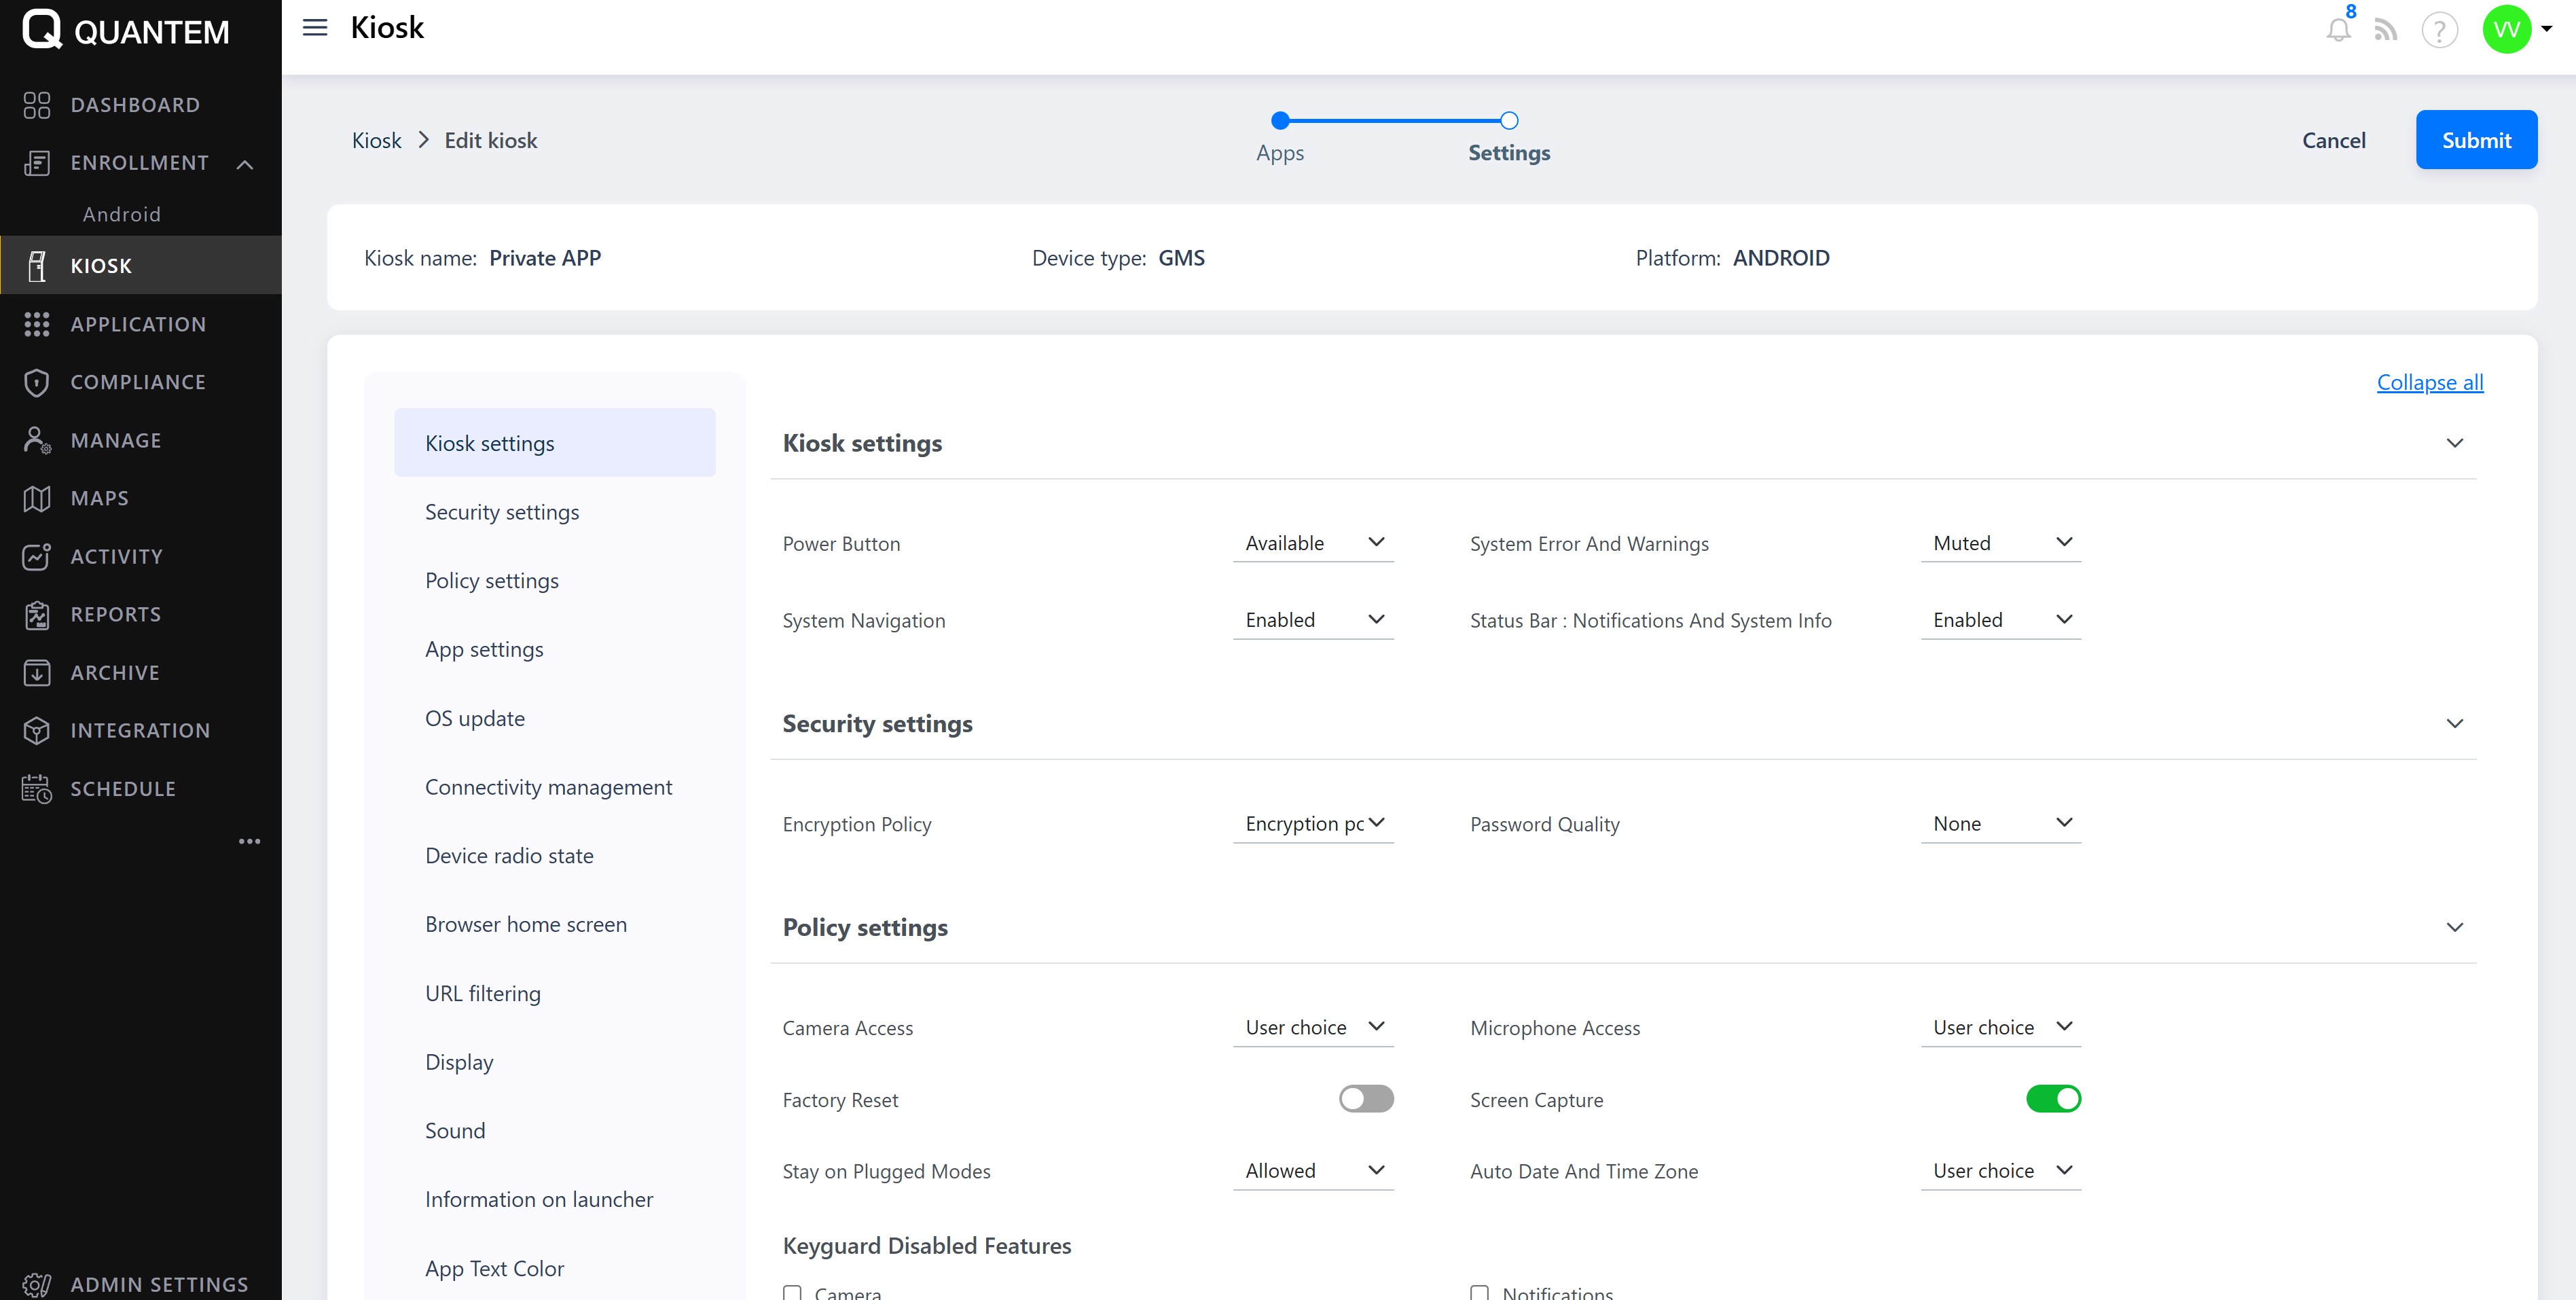
Select the required values for each setting using toggles, checkboxes, or dropdowns.
Click Submit to save the kiosk and proceed to the group assignment screen.
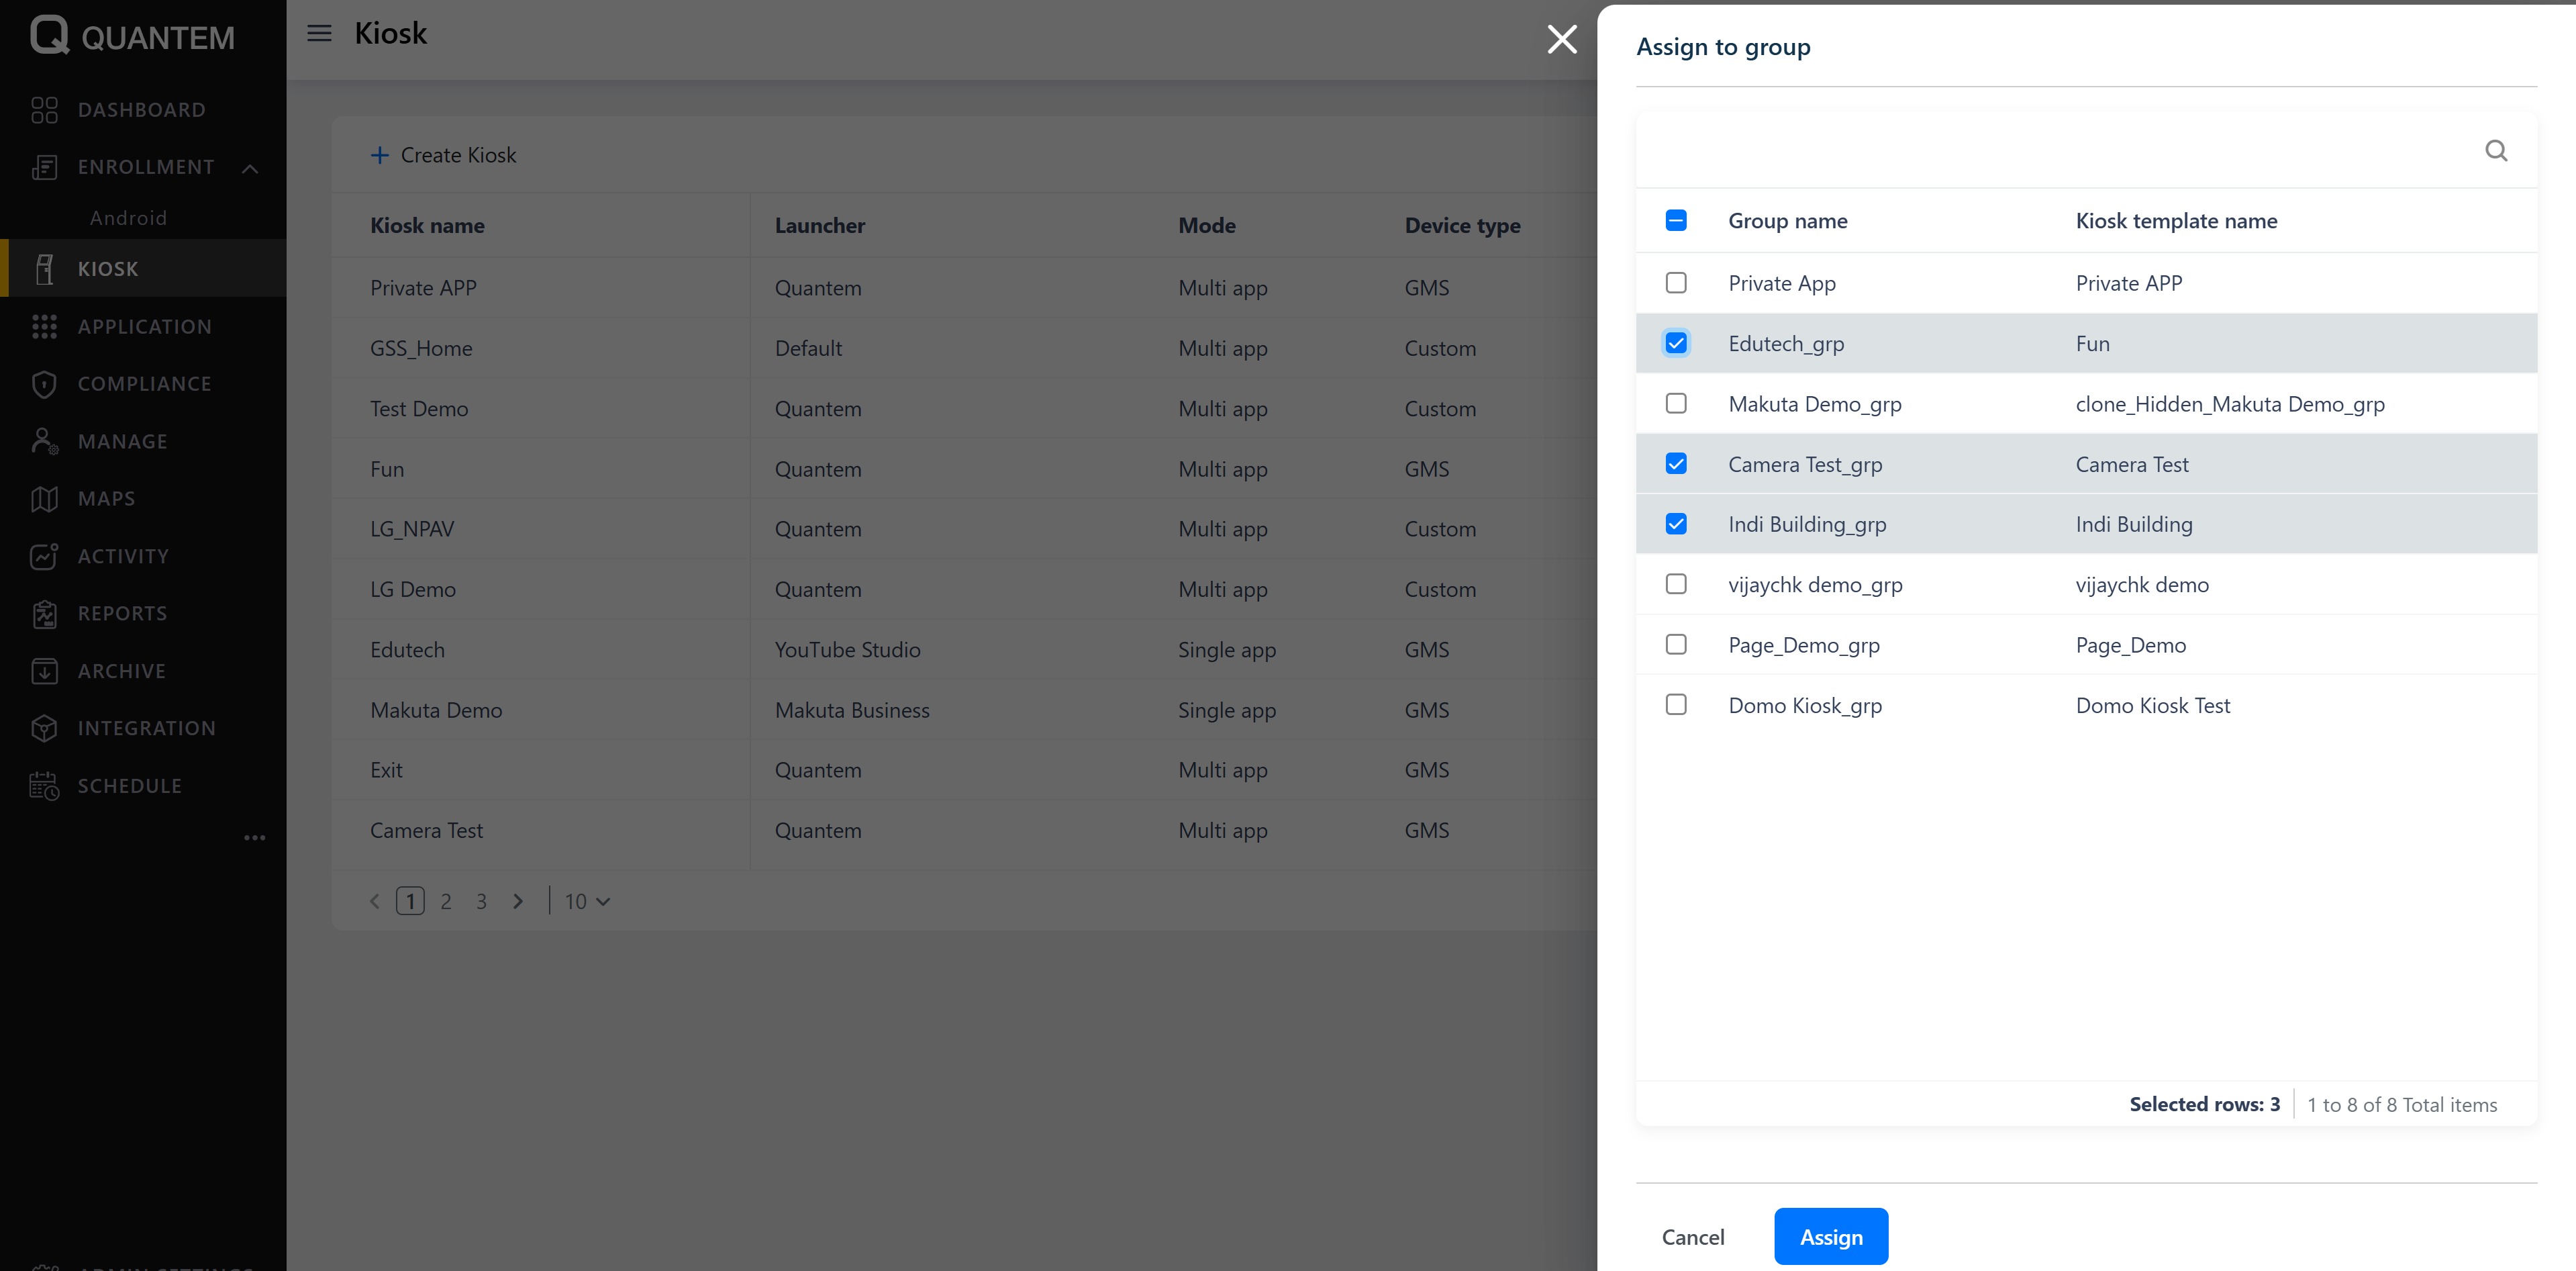
Select one or more groups from the available list to assign the kiosk to those groups.
Click Assign to complete the kiosk creation and assignment.
Viewing and editing kiosk details
From the Kiosk list, click the three vertical dots (⋮) at the end of the kiosk row.
Select View/edit details from the context menu.
The kiosk details screen opens, showing the current apps and settings.
Edit the app details as needed and click Next to proceed to the settings screen.
Modify any kiosk settings as required.
Click Save & exit to update the kiosk without reassigning groups, or Save & assign to save and reassign the kiosk to groups.sample.pdf
If Save & assign is selected, the Assign Group screen appears. Select the desired groups and click Assign to confirm.
Assigning a kiosk to groups
From the Kiosk list, click the three vertical dots (⋮) at the end of the kiosk row.
Select Assign to group from the context menu.
The Assign to group screen displays all available groups with checkboxes.
Select one or more groups to assign the kiosk to.
Click Assign to apply the kiosk to the selected groups with a confirmation message.
Deleting a kiosk
From the Kiosk list, click the three vertical dots (⋮) at the end of the kiosk row.
Select Delete from the context menu.
A confirmation dialog appears asking "Are you sure you want to delete Kiosk?"
To confirm, type the word delete in the text box.
Click Continue to remove the kiosk with a confirmation message

Was this article helpful?
That’s Great!
Thank you for your feedback
Sorry! We couldn't be helpful
Thank you for your feedback
Feedback sent
We appreciate your effort and will try to fix the article