The Policy module in the admin console lets you create, configure, and manage device policies. Policies are sets of rules and settings that control device behavior and app permissions across managed devices and groups.
Viewing available policies
In the admin console, go to Compliance > Policies from the left navigation menu.
A list of available policies is displayed in table format showing policy name, description, group count, creation date, last updated date, created by, and updated by.
The Policies list includes the following features:
Create policy – Add a new policy
Download – Export policy details to an Excel file
Context Menu – Right-click options to view, edit, assign, clone, or delete policies
Column Chooser – Show or hide table columns
Pagination – Navigate through policy lists when there are many policies
Items Per Page – Set the number of policies displayed per page (default is 10)

Creating a new policy
Click the Create policy button at the top of the Policies list.
The Create policy screen opens with fields for:
Policy name (required) – Name of the new policy
Policy description (optional) – Brief description of the policy's purpose
Policies are organized into categories: Device, System, Security, Connectivity, OS update, App, Secure browser, Configure, and OEM.
Each category contains multiple policy settings in the form of toggles and dropdown menus with default values.
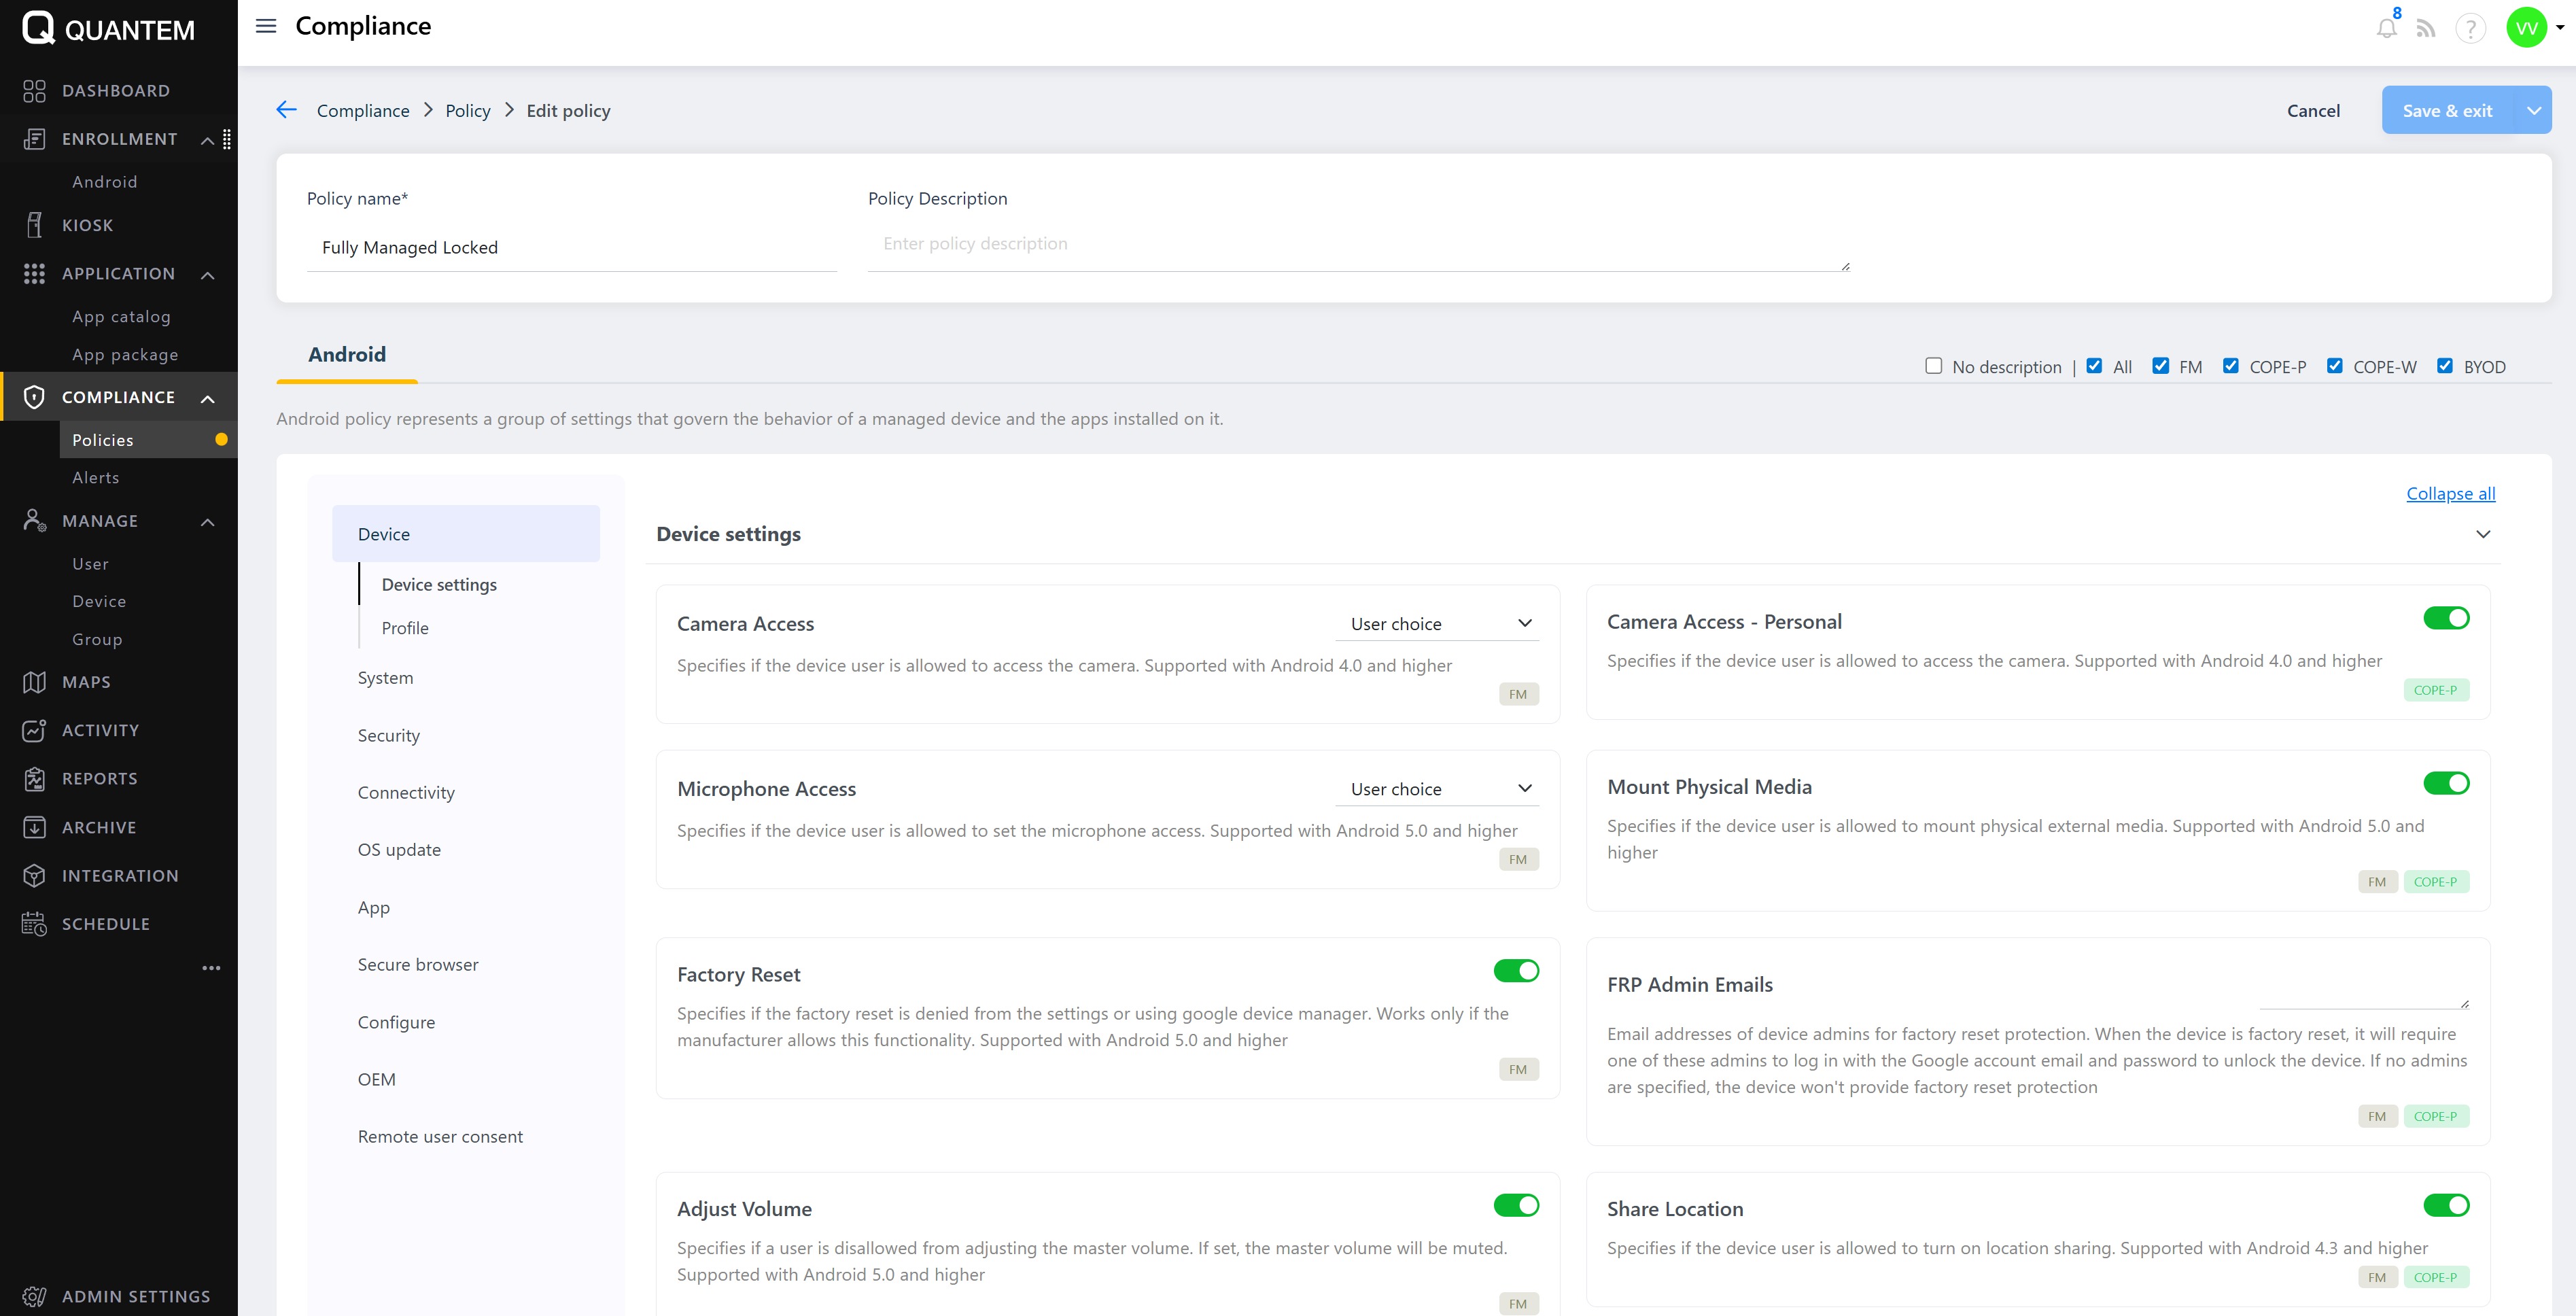
Examples of configurable settings include:
Camera Access – Allow or restrict camera use
Microphone Access – Allow or restrict microphone use
Mount Physical Media – Allow external media mounting
Factory Reset – Prevent factory reset from device settings
Adjust Volume – Restrict volume adjustment
Share Location – Control location sharing
Configure the desired Android policies by toggling settings on/off or selecting values from dropdowns.
Click the Windows tab to configure Windows policies (if applicable).
Click Save & exit to save the policy without assigning it, or Save & assign to save and assign the policy to groups immediately.
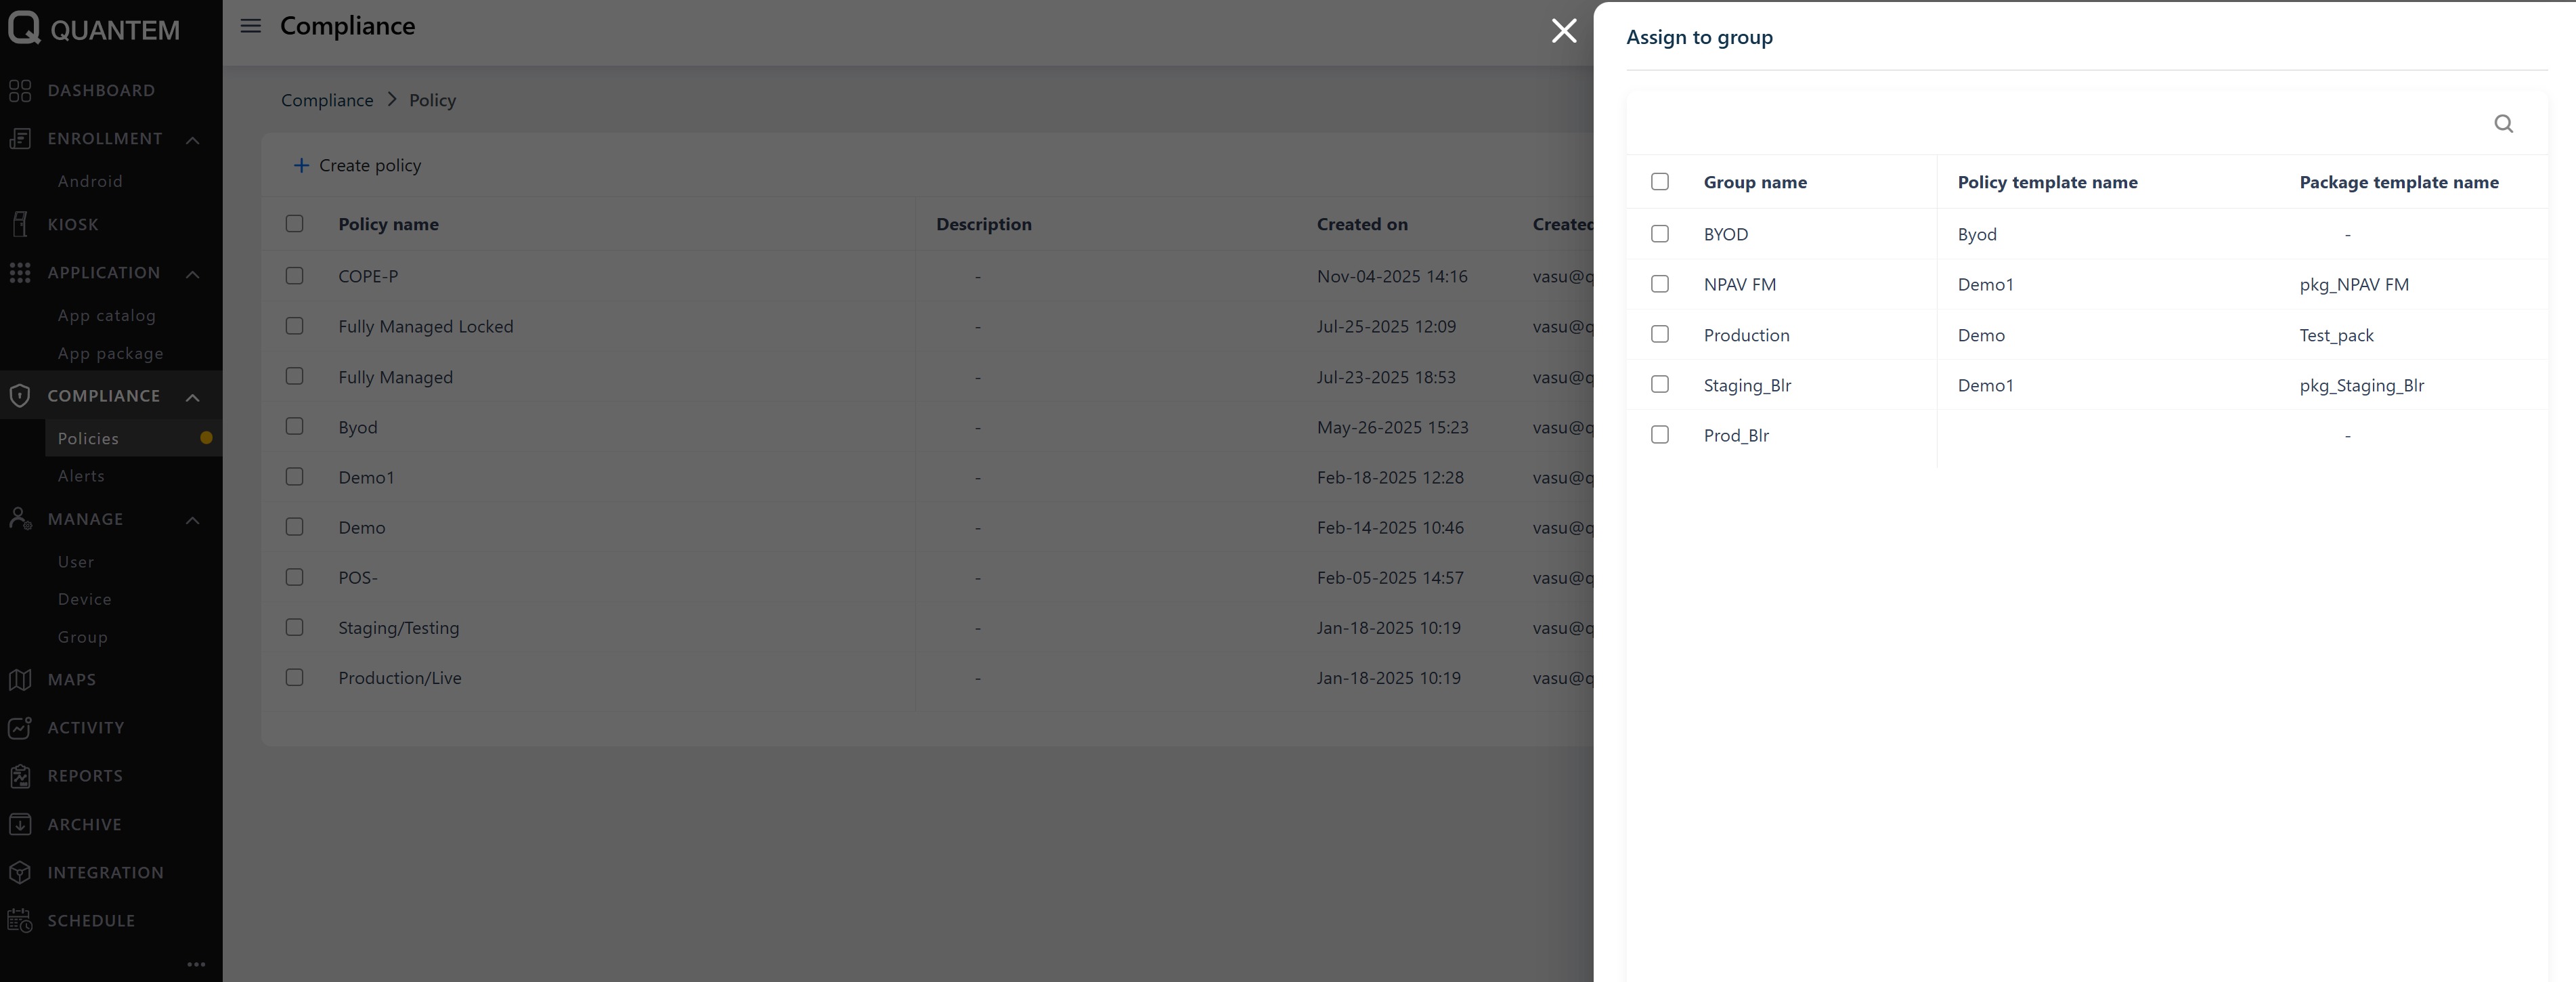
When Save & assign is selected, an Assign to group screen opens with a list of available groups. Select one or more groups and click Assign to attach the policy to those groups.
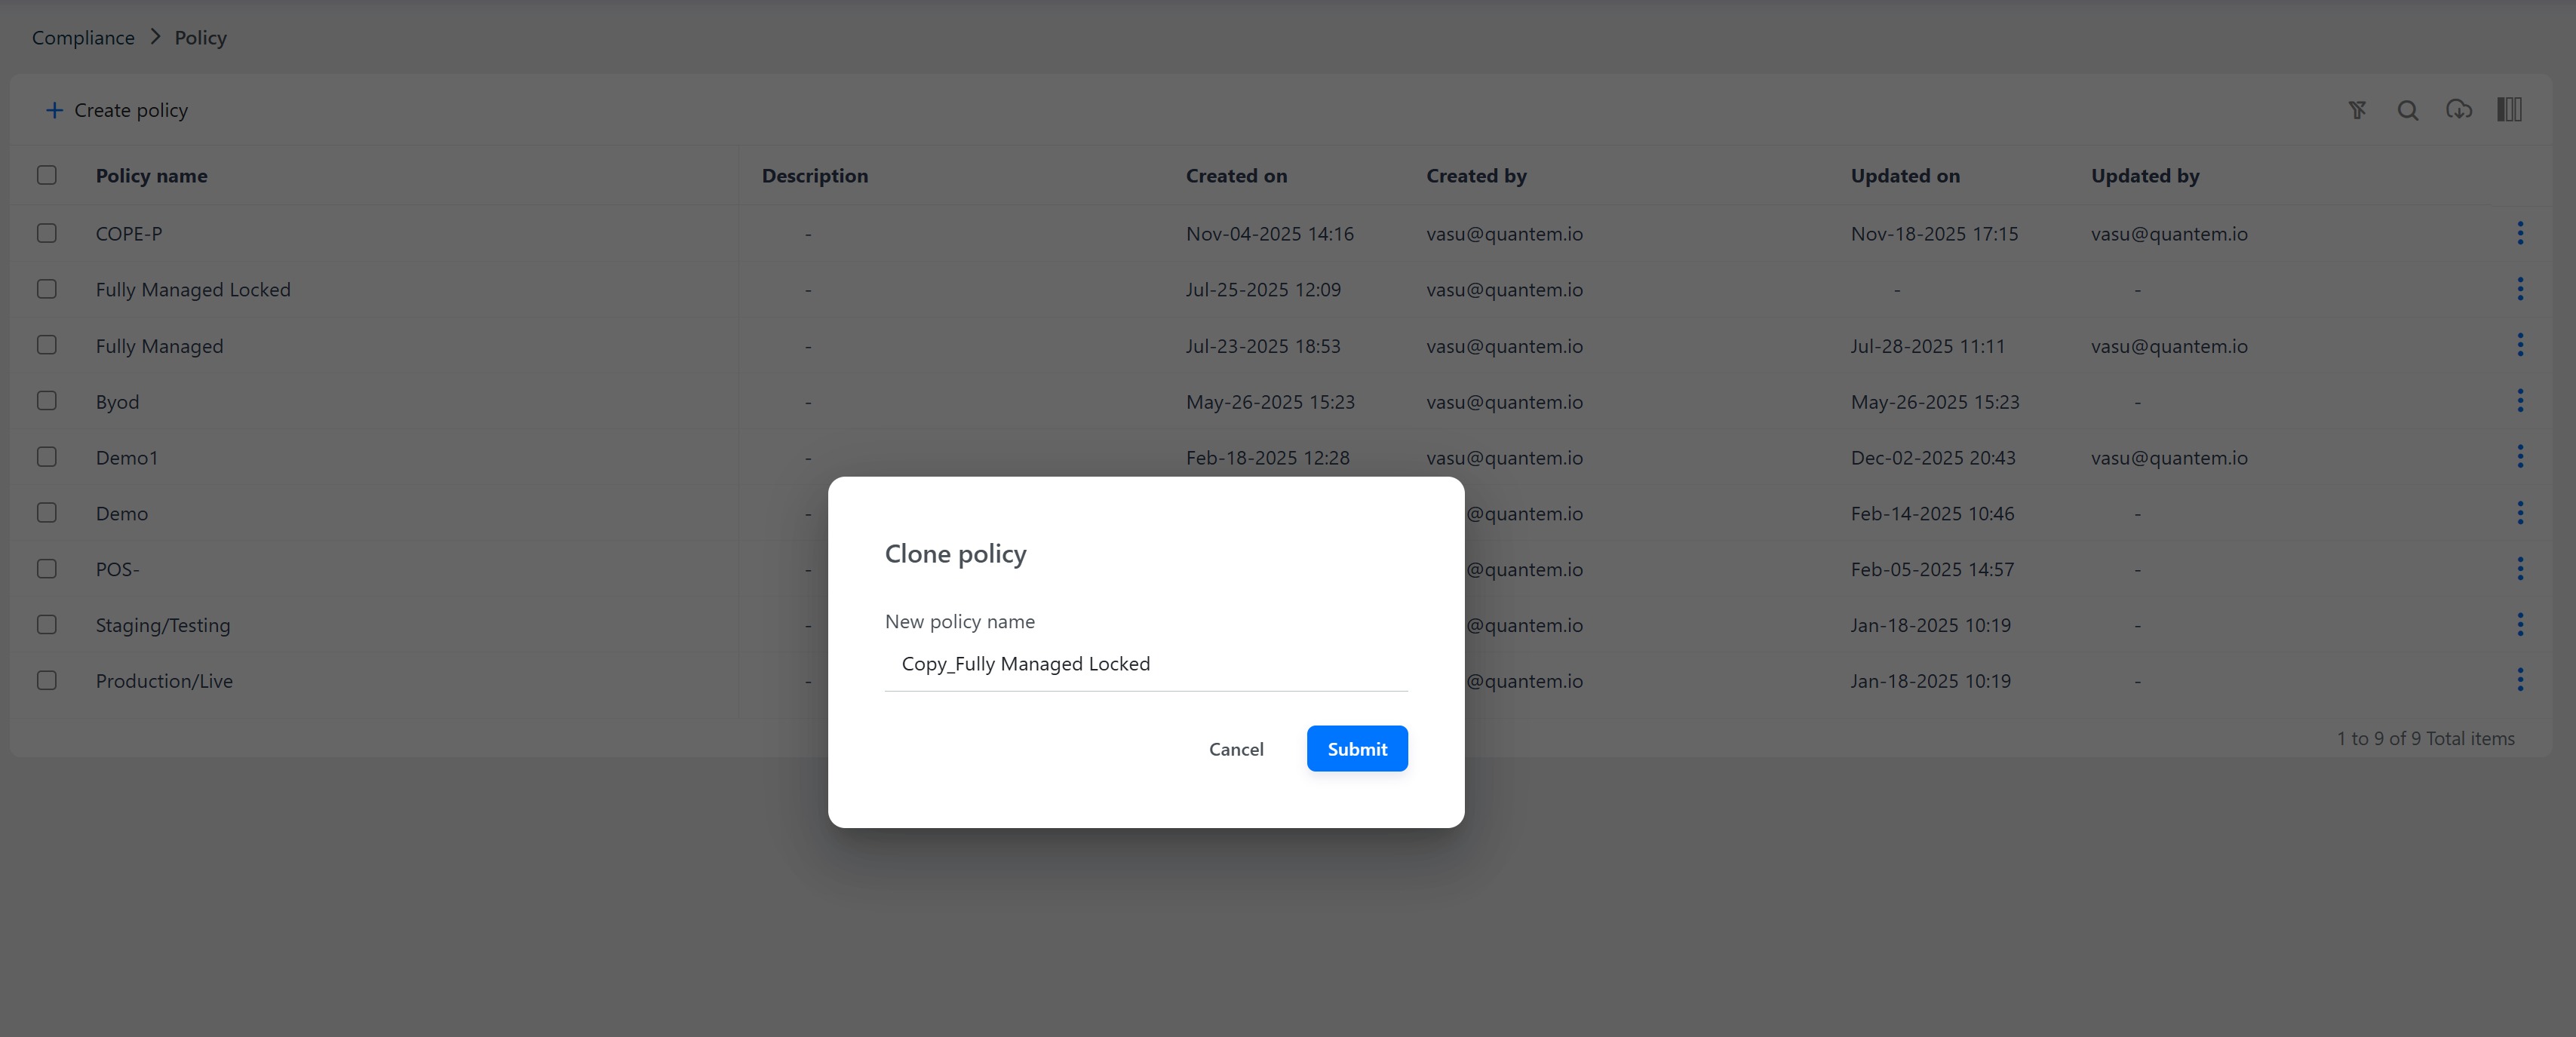
Cloning a policy
From the Policies list, click the three vertical dots (⋮) at the end of the policy row.
Select Clone from the context menu.
A Clone policy dialog appears with a default name (e.g., "Copy Fully Managed Locked").
Enter a new policy name and click Submit to create a duplicate of the policy with the new name.
Assigning a policy to groups
From the Policies list, click the three vertical dots (⋮) at the end of the policy row.
Select Assign to group from the context menu.
The Assign to group screen opens with a list of available groups.
Select one or more groups and click Assign to apply the policy to those groups with a confirmation message.
Deleting a policy
From the Policies list, click the three vertical dots (⋮) at the end of the policy row.
Select Delete from the context menu.
A confirmation dialog appears. Click Continue to delete the policy.
Note: A policy can only be deleted if it is not assigned to any group. If a policy is assigned to groups, the Delete option will be unavailable and display a tooltip explaining that the policy cannot be deleted while in use.

Downloading policy details
Click the Download button at the top of the Policies list.
A confirmation dialog shows the number of policies that will be exported (e.g., "You are about to export 9 lines of data").
Click Continue to download the policy details as an Excel file to your local computer.

Was this article helpful?
That’s Great!
Thank you for your feedback
Sorry! We couldn't be helpful
Thank you for your feedback
Feedback sent
We appreciate your effort and will try to fix the article